When we want to copy huge amounts of objects (for example, thousands of tables) or load data from variety of sources, the appropriate approach is to input the name list of the objects with required copy behaviors in a control table, and then use parameterized pipelines to read the same from the control table and apply them to the jobs accordingly. By doing so, we can maintain (for example, add/remove) the objects list to be copied easily by just updating the object names in control table instead of redeploying the pipelines. What’s more, we will have single place to easily check which objects copied by which pipelines/triggers with defined copy behaviors.
Copy data tool in Azure Data Factory (ADF) eases the journey of building such metadata driven data copy pipelines. After we go through an intuitive flow from a wizard-based experience, the tool can generate parameterized pipelines and SQL scripts for we to create external control tables accordingly. After we run the generated scripts to create the control table in our SQL database, our Azure Data Factory pipeline will read the metadata from the control table and apply them on the copy jobs automatically.
Prerequisites to Create Azure Data Factory Pipeline
- ADF Account.
- Azure SQL database (ideally 3), however for this demo we are going to use 2 databases – one for source and one for target.
- Managed Identity access from ADF to SQL database/s should be set up.
a. Create Azure Active Directory admin on the database server/s.
b. Login using active directory account in SSMS and connect to the respective databases.
c. Run the following commands
CREATE USER [adf account name] FROM EXTERNAL PROVIDER;
ALTER ROLE [db_owner] ADD MEMBER [adf account name];
- Sample table and data in source database. We used the sample data feature while provisioning the source Azure SQL database.
- Enable the firewall rules on source/target SQL Servers to allow ADF activities read data from the tables.
Demo (Copy data from Azure SQL database to Azure SQL database)
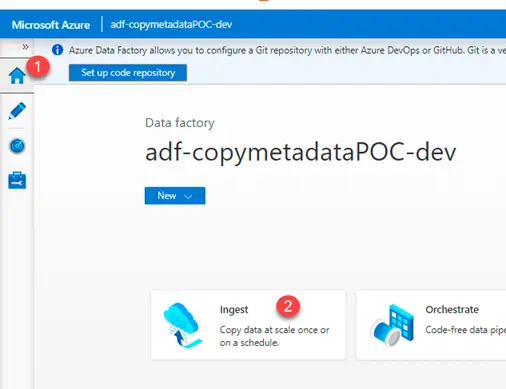
- Login to the adf account and navigate to home page. Click on Ingest icon.
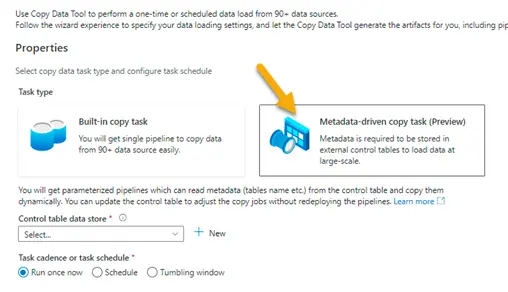
2. Select Metadata – driven copy task (Preview)
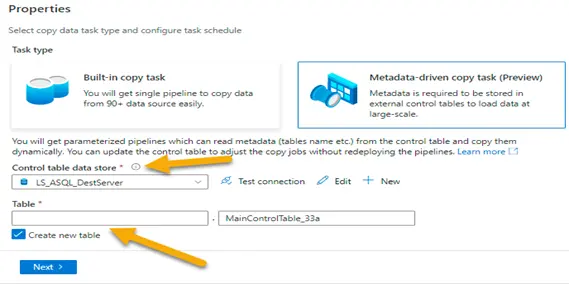
3. Select the control table data store. We might have to create a linked service if not created already.
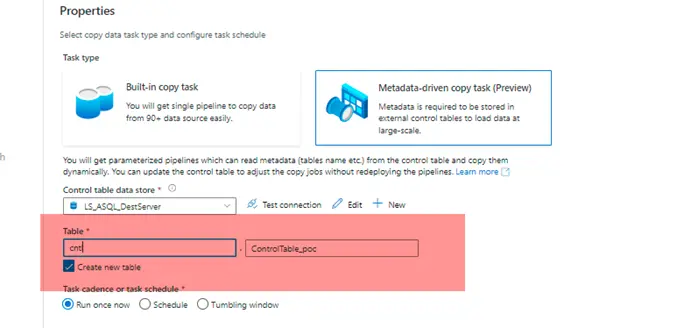
Specify the table name in the boxes below. This will be the control table where all the metadata information will be stored.
It could be an existing table or a new table.
NOTE – If it’s a new table, it must be created inside the database where control table will be stored. The script will be available for download in the last step of this wizard (Step # 10).
4. Select the source. We might have to create Linked Service if not created already
a. 1 – Select source type
b. 2 – Select Linked Service
c. 3 – Select source tables
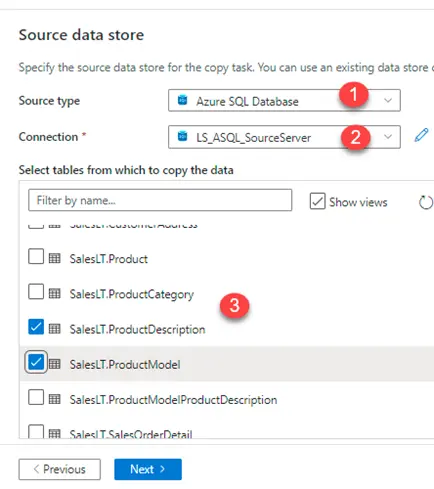
After the source tables have been selected, click Next
5. We will be taken to the window shown below. We could either select an option of full load or delta load for each table.
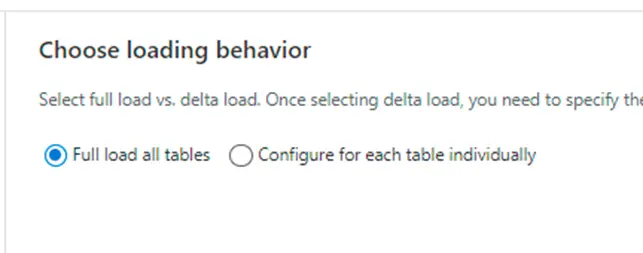
6. Here we have opted full load for one of the source tables and delta load for the second table

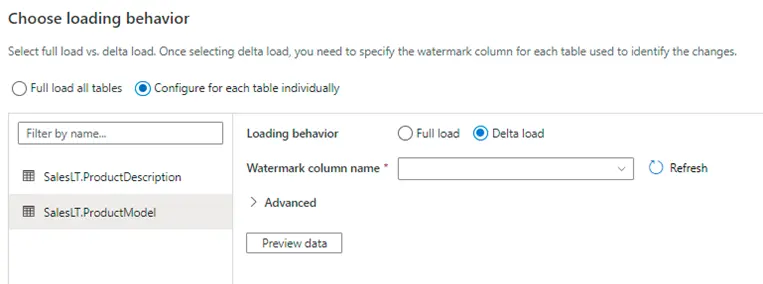
7. If the delta load option is selected, the wizard gives us the option of selecting watermark column and the start date of watermark column as shown below

8. Select destination
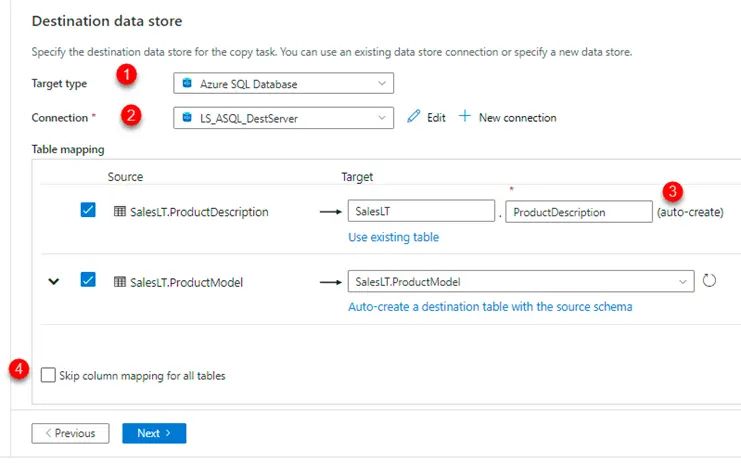
a. 1 – Destination type
b. 2 – Destination Linked Service
c. 3 – there is an option to create the table if it does not exist
d. 4 – we could skip column mapping if the name of the tables and schema in source vs target databases are same.
9. Click next and we will be taken to the below window
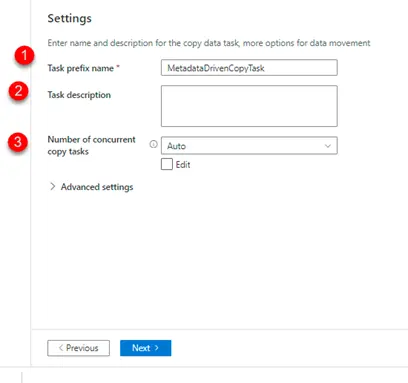
Here
a. 1- We could change the name of the copy data activity based on project requirements.
b. 2- We could give task description
c. 3- Since more than 1 table is involved in the copy data activity, it would try to load the data in batches, and we could specify the batch size here
10. Click next, do review and finish and then we will be taken to the final deployment window
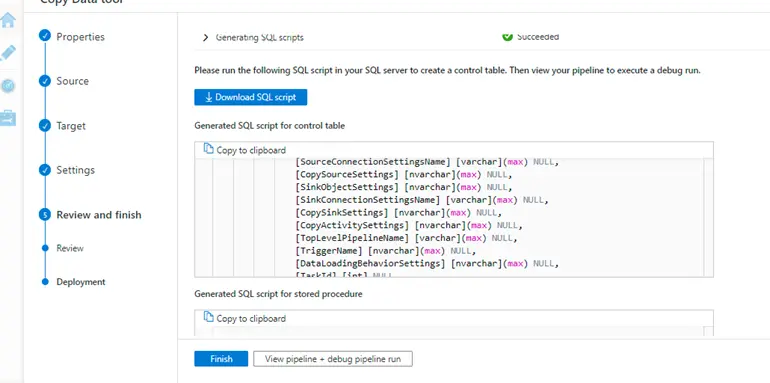
The wizard will give us 2 scripts
- One for creating control table and inserting data inside it.
- Second one will be for creating a stored proc that would update the watermark values.
Download these scripts and run it on the database where control table is supposed to exist.
11. After the wizard has finished successfully, it would have created the pipelines and the datasets as shown below
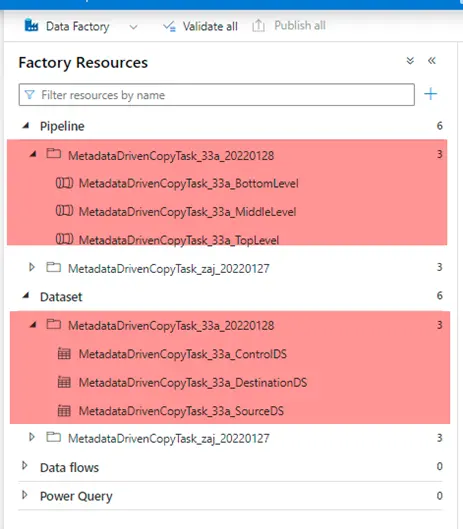
12. Trigger the pipeline
- A new table with data will be created in the target database.
- If it’s a delta load, the latest records from the source table would move into the target table.
Demo (Copy data from Flat file to Azure SQL database)
- Login to the adf account and navigate to home page. Click on Ingest icon.
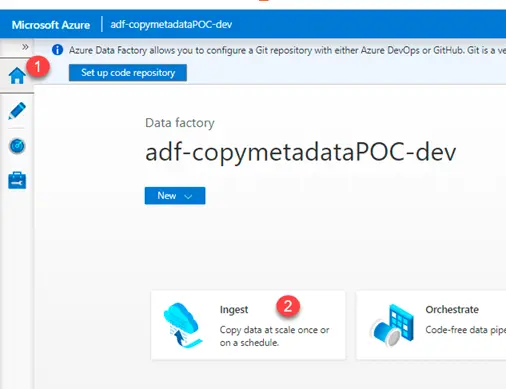
2. Select Metadata – driven copy task (Preview)
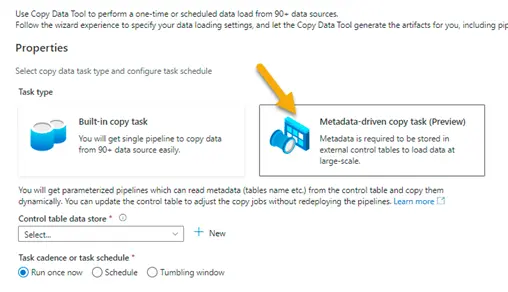
3. Select the control table data store.
We can use the existing control table.
4. Select the source. We might have to create Linked Service if not created already
a. 1 – Select source type
b. 2 – Select Linked Service
c. 3 – Select source file/folder
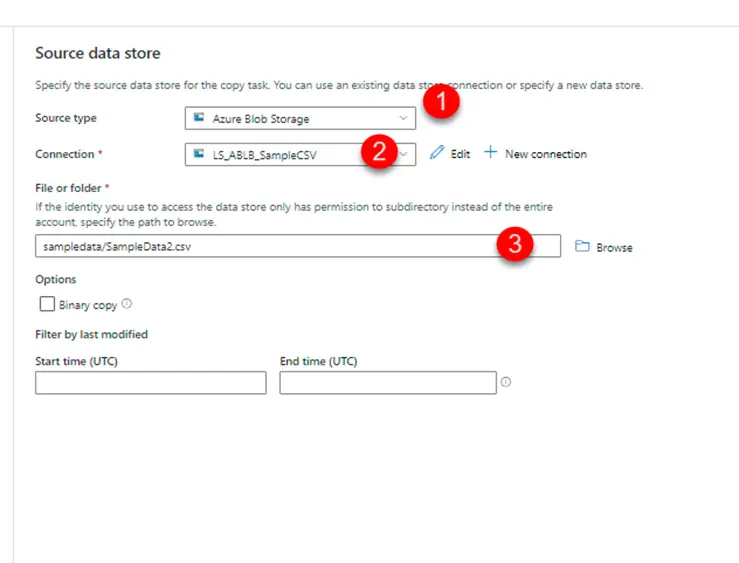
Few points to be considered here –
a) We could either select a file or a folder.
b) If it’s a folder, the schema of files inside it should be same.
c) This implies that we could move data into a single table.
d) There is no option of incrementally loading the data from the file or files.
5. Select destination
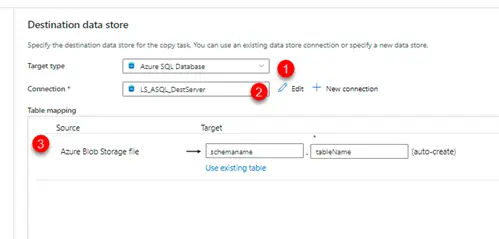
a. 1 – Destination type
b. 2 – Destination Linked Service
c. 3 – there is an option to create the table if it does not exist
6. Click next and we will be taken to the below window
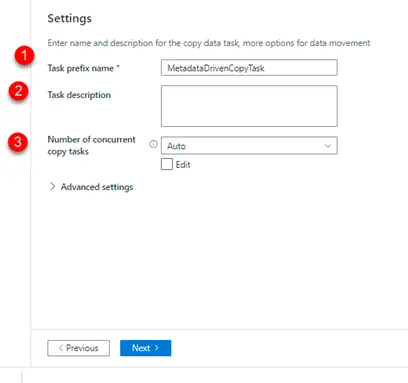
Here
d. 1- We could change the name of the copy data activity based on project requirements.
e. 2- We could give task description
f. 3- number of concurrent copy tasks
7. Click next, do review and finish and then we will be taken to the final deployment window
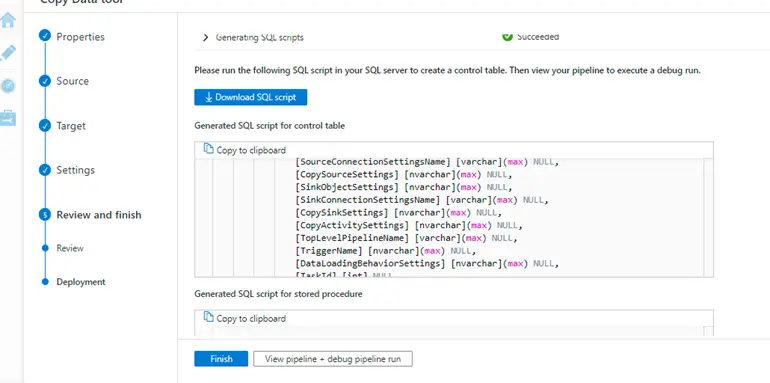
The wizard will give us 1 script
- One for creating control table and inserting data inside it.
Download these scripts and run it on the database where control table is supposed to exist.
8. After the wizard has finished successfully, it would have created the pipelines and the datasets as shown below
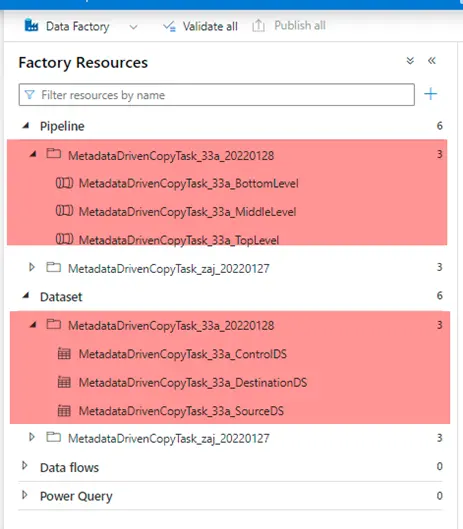
9. Trigger the pipeline
- A new table with data will be created in the target database.
Control Table Structure
| Name of the column | Description |
| SourceObjectSettings | Contains detail such as source schema and object name in json format |
| SourceConnectionSettingsName | Source Connection Setting Name (if any) |
| CopySourceSettings | Contains detail such as source query name and partition options in json format |
| SinkObjectSettings | Contains detail such as destination schema and object name in json format |
| SinkConnectionSettingsName | Destination Connection Setting Name (if any) |
| CopySinkSettings | Consists of additional details like pre copy script in json format |
| CopyActivitySettings | Consists of mapping details of source vs destination in json format |
| TopLevelPipelineName | Name of the main pipeline that invokes sub pipeline/s |
| TriggerName | Name of the trigger responsible for running the pipeline/s |
| DataLoadingBehaviorSettings | Details such as watermark columns, loading behavior in json format |
| TaskId | Id for the copy data task |
| CopyEnabled | 1 or 0 |
Limitations Azure Data Factory Pipeline
- Copy data tool does not support metadata driven ingestion for incrementally copying new files only currently. But we can bring our own parameterized pipelines to achieve that.
- IR name, database type, file format type cannot be parameterized in ADF. For example, if we want to ingest data from both Oracle Server and SQL Server, we will need two different parameterized Azure Data Factory pipeline. But the single control table can be shared by two sets of pipelines.
- OPENJSON is used in generated SQL scripts by copy data tool. If we are using SQL Server to host control table, it must be SQL Server 2016 (13.x) and later to support OPENJSON function.
Conclusion
We went through various steps required to implement a meta-data driven Azure Data Factory Pipeline using Azure’s wizard like workflow. This would save a lot of development efforts and would be beneficial if your team is not well versed with SQL coding. Though there are some limitations with this approach as mentioned above, it should give the teams a great starting point in very less turnaround time. The teams then could customize the solution based on the project requirements.


