
Deployment of environments can be simplified and kept consistent using the DevOps concept Infrastructure as a Code (IaC). This reduces the time to create environments on demand for testing, user acceptance and helps tracing deployment failures way before the production release of the application.
Azure Resource Manager templates enables creation of resources like Virtual machines, web apps, databases, Virtual Networks, Search Services, Storage Accounts, and many other resources. It follows a simple JSON with 3 different sections described below:
- Parameters: Values that are provided when deployment is executed to customize resource deployment for different environments
- Variables: Values that are used as JSON fragments in the template to simplify template language expressions. These could be constructed based on parameters. These could be re-used in the templates for different environments
Resources: Resources that needs to be deployed/updated in a resource group
Outputs: Return values from the deployed resources
In this article, we will learn how to:
- Create a basic template
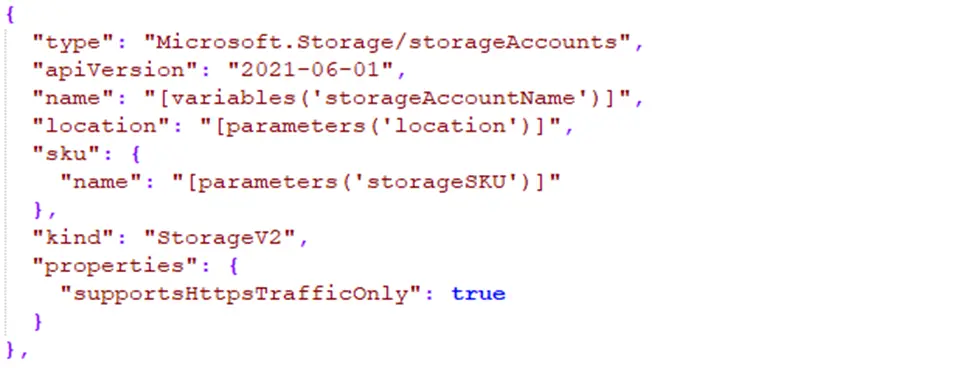
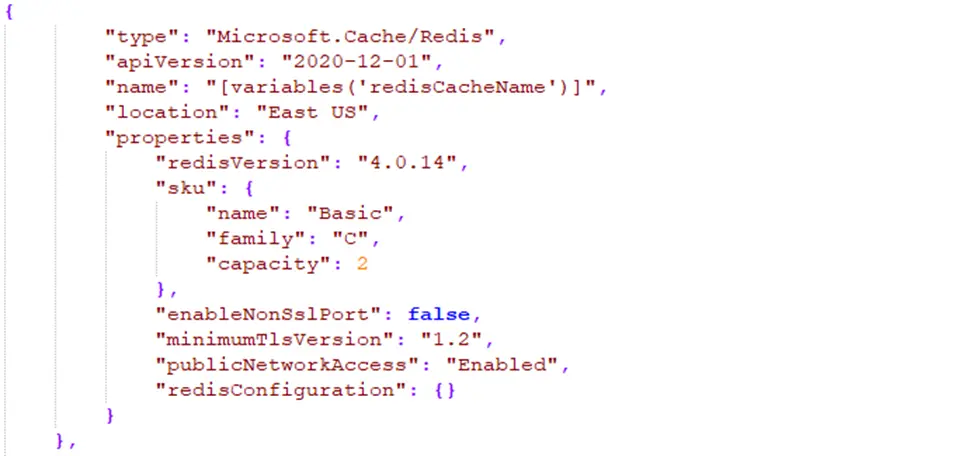
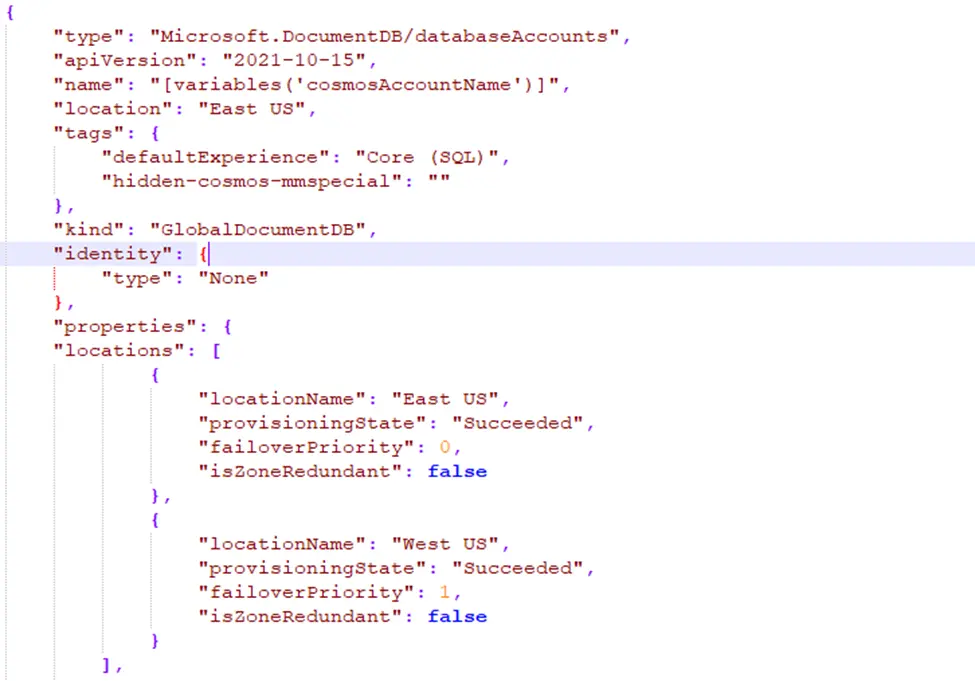
- Different resources that can be created using a template
- Deploy the template using the Custom Deployment from Azure portal
Pre-requisite: How to create a resource group in Azure portal
How to create a basic template:
- Open any text editor where working with JSON is simple and easy
Example: Visual Studio Code, Notepad++
2. Create a new file, name it sample.json and use the below code to start with

- Save the file. This would create the first template.
The template size should be limited to 4MB. The 4-MB limit is on the final state of the template after it has been expanded with iterative resource definitions and values for variables and parameters.
Below are some limits on the items in the template:
- 256 parameters
- 256 variables
- 800 resources (including copy count)
- 64 output values
- 24,576 characters in a template expression
The template limits can be exceeded by using a nested template.
Let’s know the different resources that can be created.
Different resources that can be created using a template
There can be different resources that can be added into the template.
- Storage Account
- Web App

- Redis Cache
- Database
Deploy the template using the Custom Deployment from Azure portal
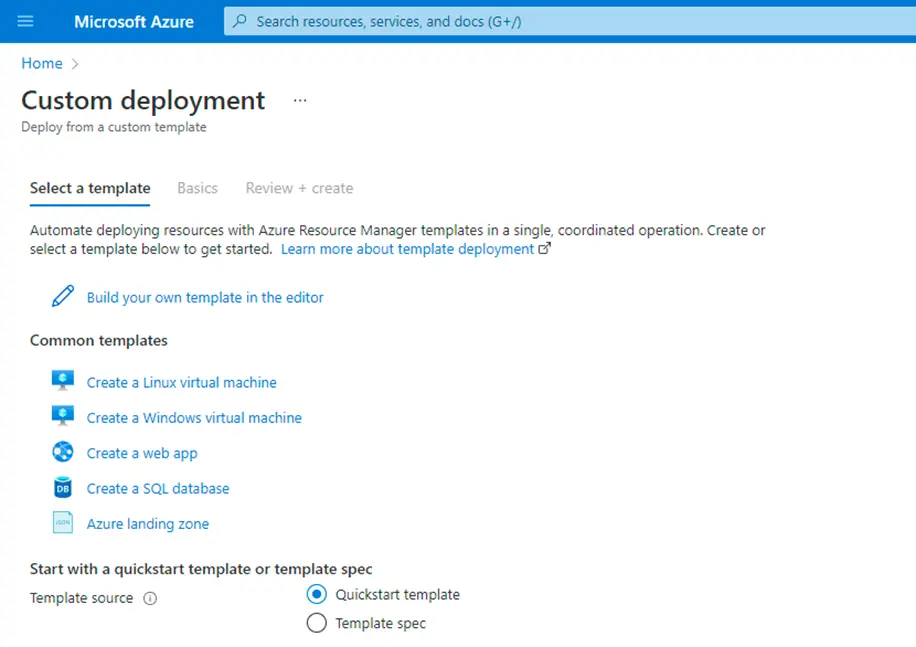
1. Login to Azure portal and search for the keyword ‘deploy’. Select the ‘Deploy a custom template’.
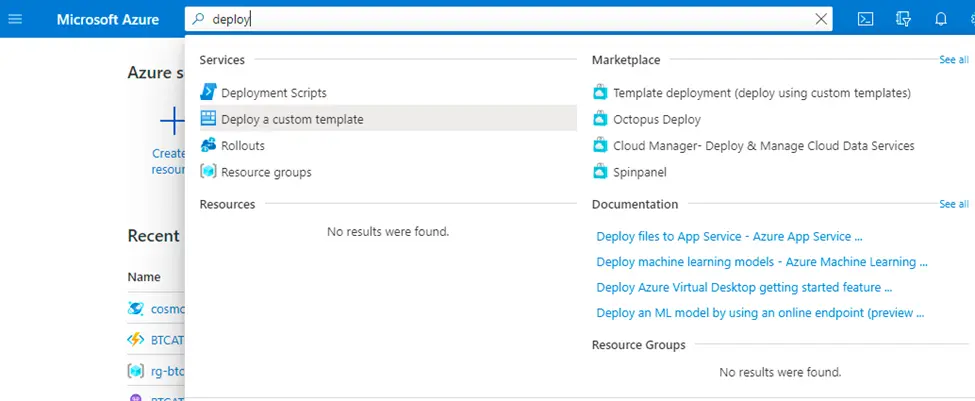
2. Click on the link ‘Build your own template in editor’
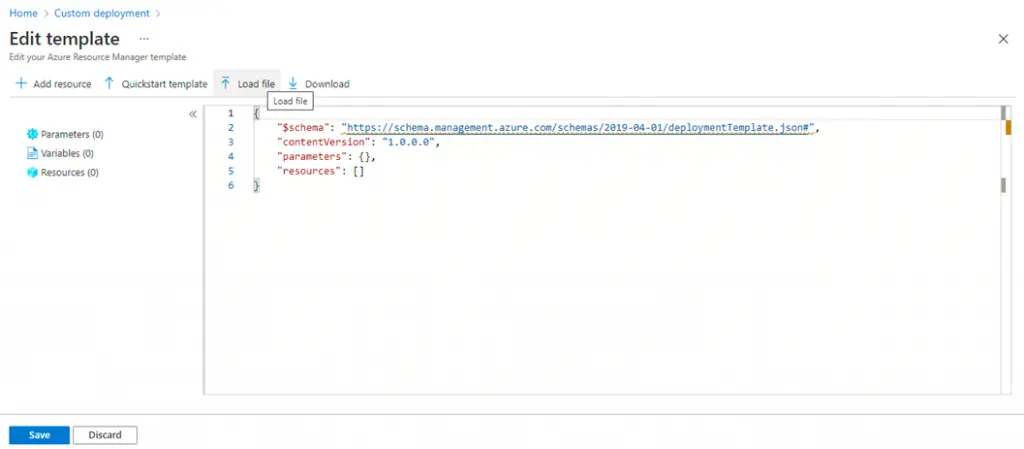
3. Use the ‘Load file’ option and upload the template file that is created in the initial step above. Click on ‘Save’ button.
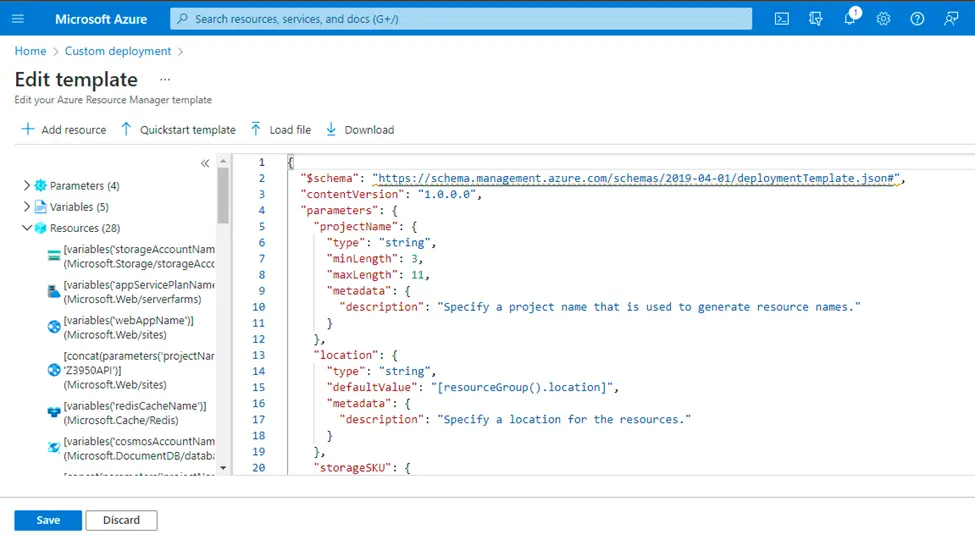
4. Provide the required parameter values. Select the resource group where all the specified resources need to be created.
Click on ‘Review + Create’ button as shown in the screenshot below.
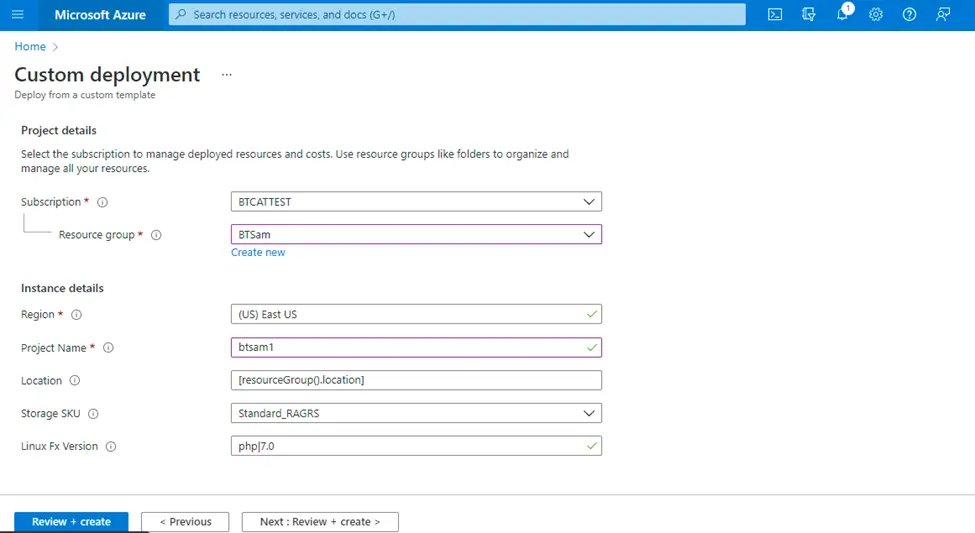
5. The template provided is validated and then displays the parameters provided.
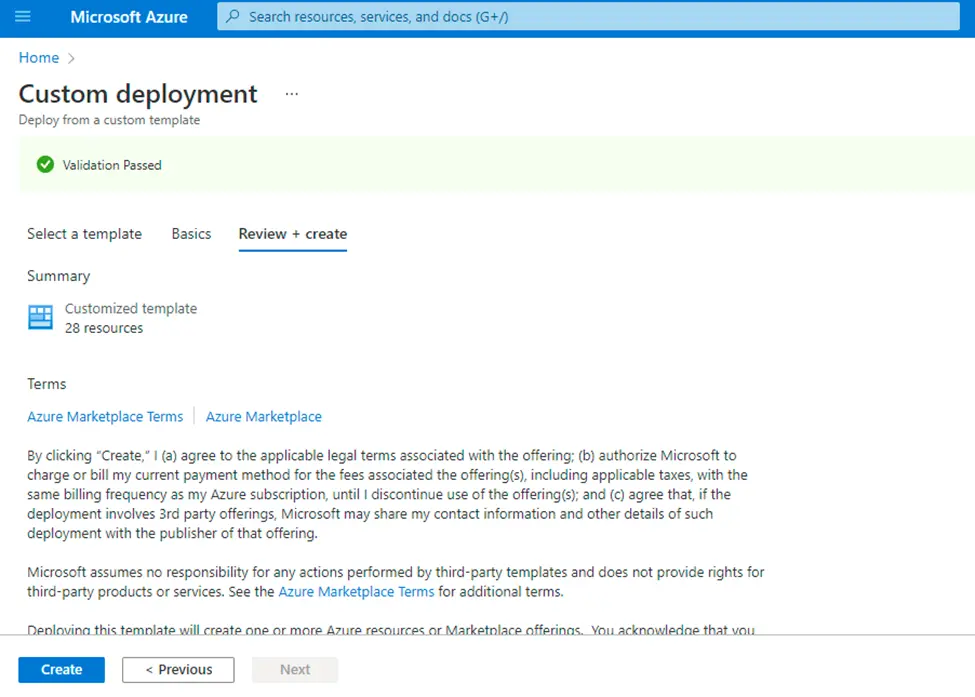
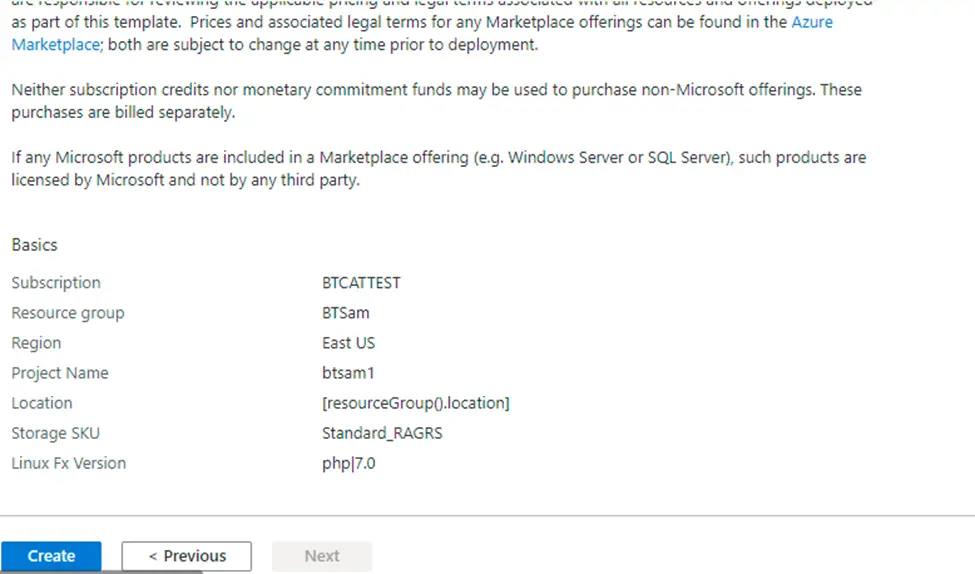
6. Check the ‘Basics’ section displayed with the provided parameters and click on ‘Create’. This will start the deployment process in the portal.
7. The deployment will take a little while to create all the resources in the specified resource group.
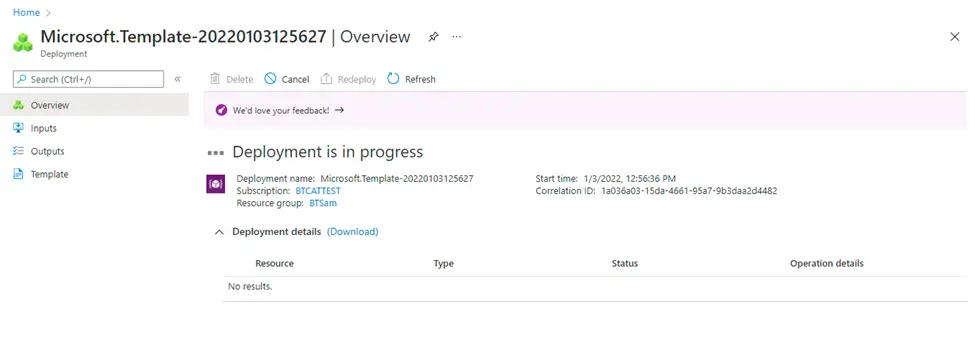
Once the deployment is complete, all the resources will be created and will be available in the specified resource group.
Conclusion
Azure Resource Manager (ARM) templates provide a powerful way to define Azure resources and configurations, and it majorly helps the users with consistency and automation of resource deployment. Leveraging the Azure portal is one of the most accessible and most intuitive options for deployment.


