Microsoft 365 Tenant to Tenant Migration

Sachin

Microsoft 365 tenant to tenant migration might seem complicated, yet it’s often a must for companies dealing with mergers, acquisitions, rebranding, compliance requirements or simply wanting to streamline operations.
In this blog, we’ll briefly explore the entire journey of Microsoft 365 tenant to tenant migration using the AvePoint Fly tool, walking through each major phase, potential obstacles, and proven strategies for success.
A Sneak Peek at Microsoft 365 Tenant to Tenant Migration
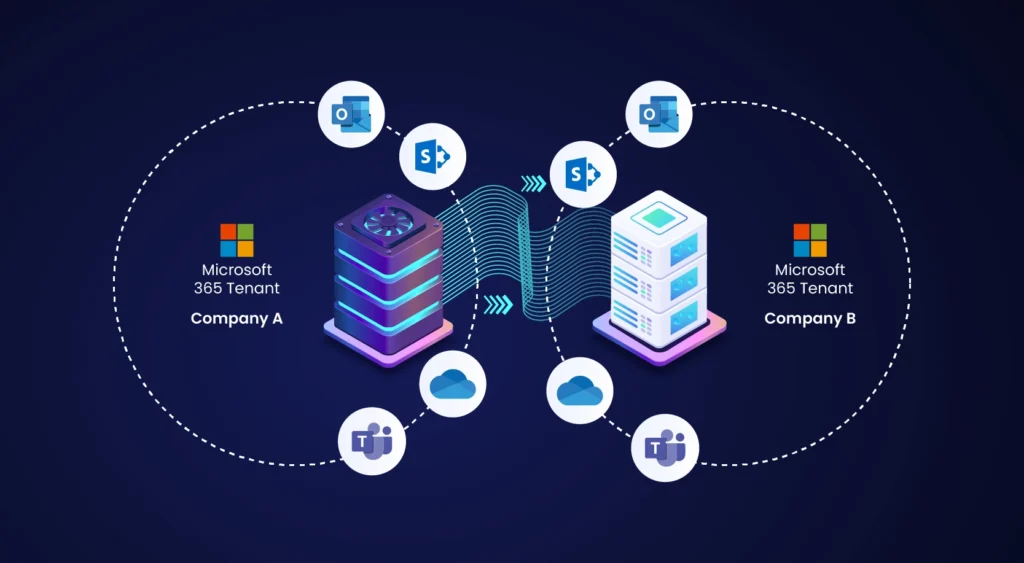
A tenant-to-tenant migration indicates migrating all your data, users, and configurations from one Microsoft 365 environment to another. It’s especially helpful for organizations that are merging tenants or need to shift user accounts elsewhere. Typically, the pieces you’re transferring include:
- Mailboxes — Emails, calendars, contacts, and tasks.
- SharePoint Sites — Document libraries and site collections.
- Microsoft Teams — Teams, channels, chats, and files.
- OneDrive for Business: User files and folders
- M365 Groups: Group settings and memberships
Reasons for Migration
Organizations typically undertake tenant-to-tenant migrations for these principal reasons:
- Mergers and Acquisitions: Combining operations often require a single tenant for efficiency
- Rebranding: A name or structural change may call for a fresh tenant
- Consolidation: Fewer tenants can reduce complexity and costs
- Tenant Split: Separating internal and external users for security or compliance
Do I Need a Migration Tool?
If you’re thinking about how to move from one M365 tenant to another, you’ll quickly see that a dedicated migration tool can make your life a whole lot easier.
Here are some reasons why:
- Migration Complexity – Handling data and settings across tenants can, at times, get really messy. A specialized tool creates a clear path for emails, files, and collaboration material, so you’re not scrambling to keep track of everything.
- Data Integrity and Security – When you migrate, you want all your information intact—metadata, permissions, and private data. A proper tool keeps everything in a single piece, completely minimizing the risk of leaks or corruption.
- Minimized Downtime – Long service interruptions annoy everyone—however, by scheduling in advance and leveraging transitional features, migration tools help you reduce hiccups and keep daily work flowing.
- Automated Processes – Doing everything by hand can be error-prone—letting the tool handle user mapping and data transfer speeds things up and reduces mistakes.
- Comprehensive Support for Multiple Workloads – You’re likely migrating more than just email—a robust tool covers Exchange Online, SharePoint, OneDrive, Teams, and more, so you’re not juggling multiple solutions. A robust tool supports Exchange Online, SharePoint, OneDrive, Teams, and more—ensuring consistent coverage.
- Real-Time Monitoring and Reporting – Dashboards enable administrators to track migration progress—and quickly address any issues that crop up.
- Post-Migration Validation – Tools typically include verification steps to confirm successful transfer and functionality in the new tenant.
- Expert Help and Advice – Many tools grant access to specialist teams who assist with unexpected hurdles.
Tools for Microsoft 365 Tenant to Tenant Migration
Multiple solutions exist for M365 tenant migrations (e.g., BitTitan MigrationWiz, Cloudiway, Quest on Demand Migration).
However, AvePoint FLY stands out because it:
- Supports Exchange Online, SharePoint, OneDrive, and Teams
- Provides a user-friendly dashboard
- Preserves metadata, permissions, and relationships
- Offers flexible scheduling to reduce disruption
- Includes real-time monitoring
- Maintains a dedicated support team
- Has multiple licensing options
Microsoft 365 Tenant to Tenant Migration Process
Although each migration is unique, most follow four main stages:
Assessment, Pre-Migration, Migration, and Post-Migration.
Assessment
- Envisioning Session: Discover and catalog data in the source tenant. Onboard the team with access to required environments, then run tools to gather inventory.
- Stakeholder Buy-Ins: Align with stakeholders on data volume, timelines, and expectations for the new platform.
- IT Infrastructure Setup: Ensure service accounts, app profiles, and vendor support channels are ready.
- Define Communication Strategy: Plan content, timelines, and messaging to keep everyone informed.
- Governance, Security, & Compliance: Coordinate with governance teams about any legal holds, MIP labeling, or compliance policies.
Pre-Migration
- Identity & Access Management: Migrate or create user accounts, groups, and distribution lists, then assign appropriate M365 licenses.
- Pilot Content Migration: Select sample data, run a pilot migration, validate the results, and summarize the findings in a report.
- Training Plan: Develop user training and resources (presentations, videos, etc.).
- Pilot Roll-out: Let selected users test the new environment, gathering feedback for refinements.
Migration
- Content Migration: Re-run inventories, plan tasks for each workload, configure and run migration jobs, and monitor results.
- Identify/Fix Issues: Validate migrated data and re-run any jobs to address errors.
- Vendor Engagement: Seek help from the tool vendor if issues persist.
- Periodic Incremental Migrations: Schedule regular incremental jobs to capture ongoing changes while the process unfolds.
Post-Migration
- Lock-In Period: During this stage, you restrict modifications to the original tenant according to the established plan.
- Final Delta: Migrate all the data that changed since the most recent incremental run, then conduct smoke tests.
- Go-Live: Introduce the new environment to users, supported by communications from the organizational change team.
- Rolling Hypercare: Provide dedicated support (via calls, chats, or emails) for a set duration once the migration is complete.
Migration Using AvePoint Fly SaaS Tool
AvePoint Fly is a cloud-based tool that is designed to migrate data across multiple platforms.
Below, we have provided a concise overview of how you can configure M365 Tenant-to-Tenant migration while using AvePoint FLY:
Pre-requisites
Migration App Profile Creation
- Choose between service accounts or an App Profile (the latter is often preferred).
- Configure app registrations in Azure Entra ID for source and target.
- Assign M365 licenses and relevant admin rights for the service account in both tenants.
User Accounts/Groups Creation
- Prepare user accounts, security groups, and distribution lists in the target tenant, each with proper licensing.
SPO/Teams/Mailbox Setup
- Create SharePoint sites, Teams, and valid mailboxes in the target environment.
User & Group Mapping Files
- Generate a mapping file listing each user’s source and target IDs, including relevant group mappings.
FLY Tool Configuration
- Configure Connections: In FLY’s Connection Manager, build source and target connections for the workloads you’ll migrate.
Configure Policies
- Create migration policies, attach your mapping file, decide on versioning and permissions, and set the default policy.
Job Creation
- Create workload-specific jobs (OneDrive, Teams, SharePoint, or Exchange).
- Add mappings via a UI or a bulk file upload, then apply the default policy.
Migration
- Running Jobs: Select the user mappings and choose “Run Full Migration.”
- Monitor Job: Track progress, check for errors, and stop or drill down as needed.
Data Validation
- Extracting Migration Reports: Download job reports in Excel to see which objects were successful, skipped, or failed.
- QA Validation: Manually verify the data in OneDrive, SharePoint, Teams, or mailboxes.
- Re-running Jobs: Address issues and re-run any incomplete segments using “Incremental” or “Failed Objects” modes.
Incremental Migration
- Conduct incremental migrations to capture modifications that occur after the initial run, then perform the same QA process.
Delta Migration & Go-Live
- Lock Down Source Workloads: Set OneDrive or SharePoint sites to read-only, archive Teams, and disable Exchange mailboxes.
Final Delta Migration
- Catch any last-minute changes, then conduct a smoke test.
Go-Live Comms
- Notify stakeholders and publish summary reports.
Hypercare
- When users return to work, remain available for additional support. Provide help via email, chat, or phone to address final questions.
Final Thoughts
A well-planned Microsoft 365 tenant to tenant migration lays the groundwork for more streamlined operations and reduced complexity. Organizations can maintain data integrity, preserve security, and minimize downtime by following a structured process—Assessment, Pre-Migration, Migration, and Post-Migration—and leveraging a dedicated tool like AvePoint Fly. Incremental migrations, thorough QA checks, and post-migration hypercare ensure users transition smoothly to the new environment, keeping daily work on track and securing long-term benefits for the organization.
What’s Next
A successful Microsoft 365 tenant to tenant migration needs careful preparation, clear communication, and the right tools. If you’re looking for help or more details about Microsoft 365 migrations, WinWire offers the technology and proven expertise you need.
Schedule a discovery call today, and let’s talk!